Challenge · Modern Quilting

Tribute to Yvonne Porcella

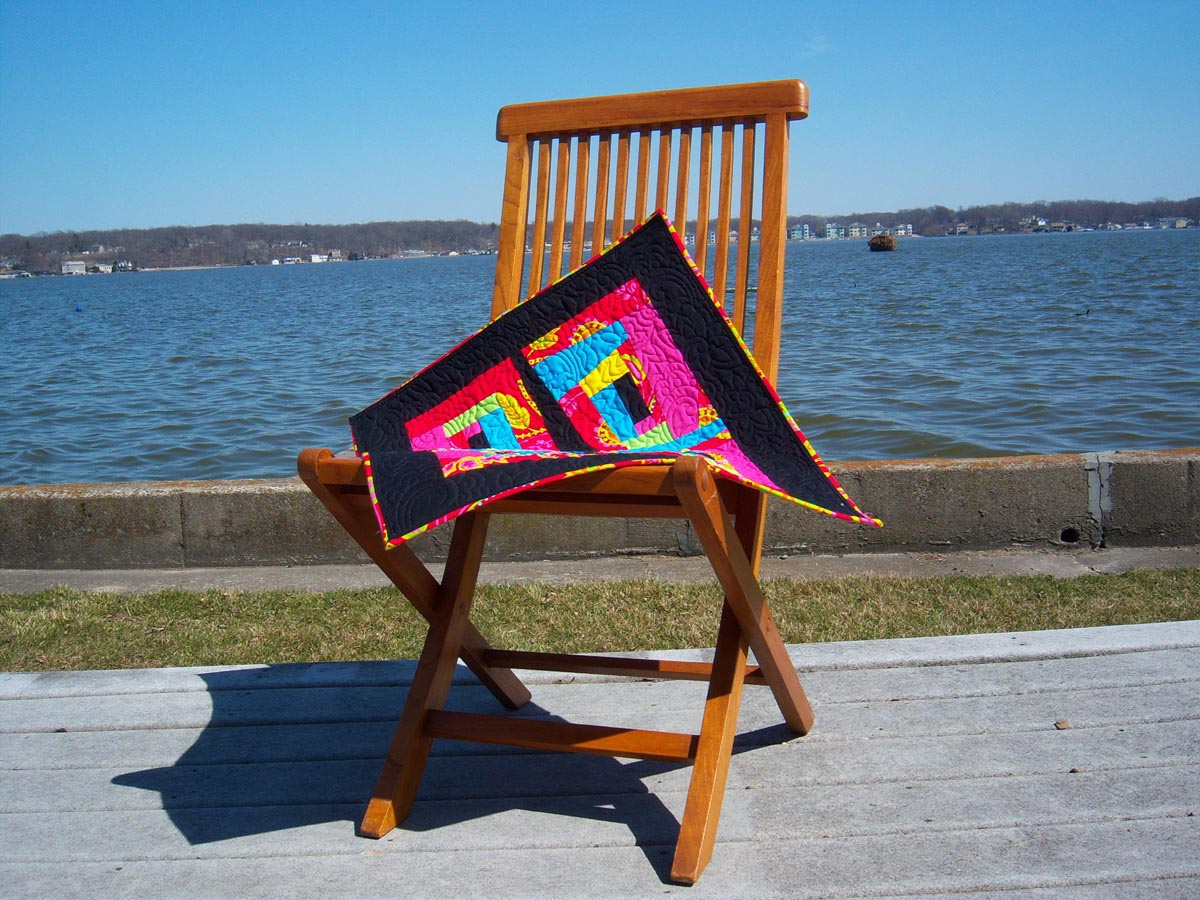
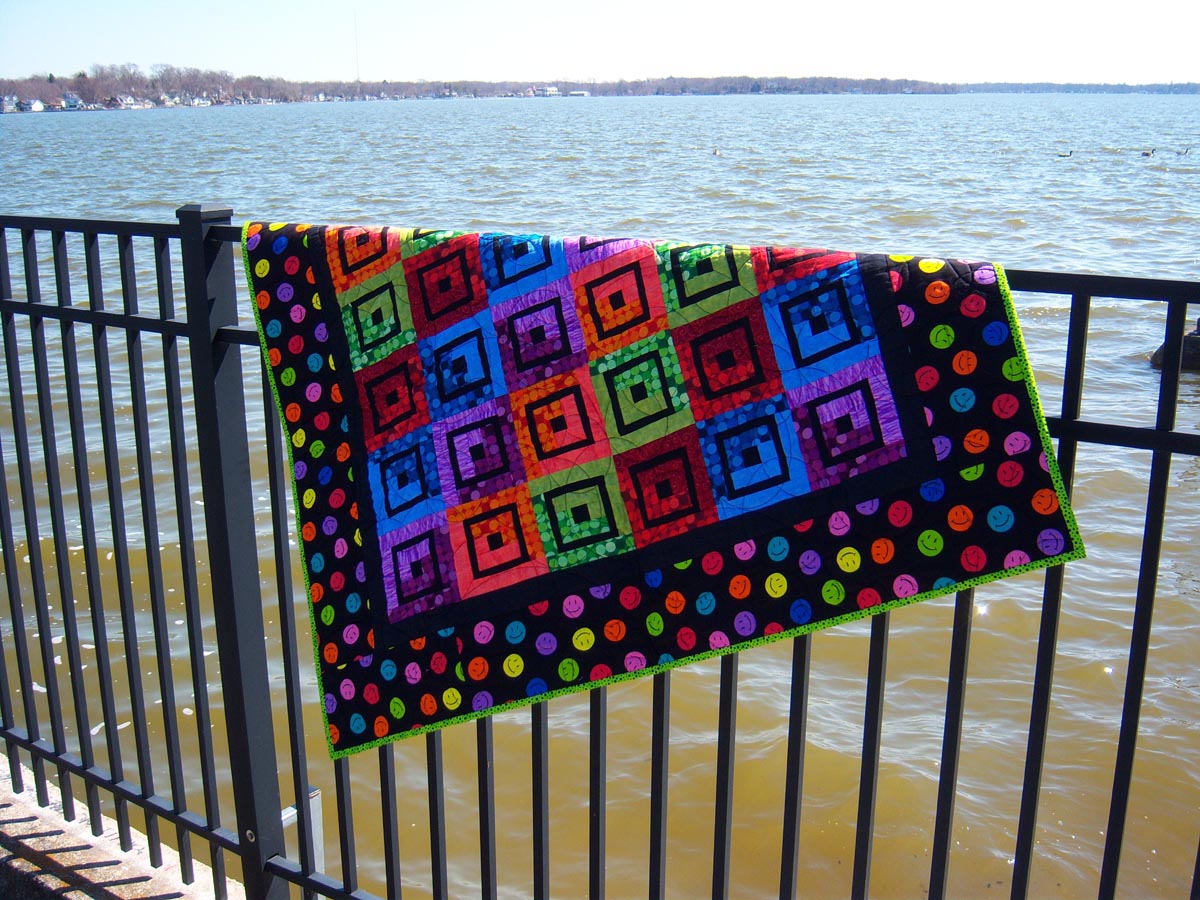
Lolipop by Judy Tucker

“Live Your BRIGHTEST Life: A Tribute to Yvonne Porcella” will be a featured art quilt exhibit hosted by Pokey Bolton at this weekend’s Quilting in the Garden in the greenhouse at Alden Lane (Livermore, California).

Quilting in the Garden at Alden Lane Nursery again offers hundreds of quilts from celebrated artists and the quilting community. These are hung for display throughout the nursery using their enormous and beautiful heritage oaks serve as both support structure and background for this wonderful 2-day display of color.  The quilts go up by 9:00 each morning supported by dozens of quilt lines. Quilts come down each night. My quilt titled “Lolipop” will be included in this years featured hosted exhibit.

General Information Quilting · Modern Quilting

Simply Moderne Topiary

Have you heard of the magazine Simply Moderne?

This publication is fairly new and, in fact, NOV/DEC issue #3  came out. Yep, I am excited too!  Tell ya why in a moment.

simplymodernepublication

As you look through the many inspiring pages of work and designs you will notice it is sooooo filled with info. Wonderful crafted works and patterns with just a smidge of advertising. Yes, a smidge. And choked full of templates in the back. Just enough balance for my taste and pleasure. Now, if you have a copy or are still going to Joann Fabrics or Barnes and Noble before they switch out, grab a copy.
simply moderne vol 3 3

THEN….turn to pages 54 – 57.   See it? Yep…..me or mine I should say.   If you look really close on page 43 , even the back of my quilt was able to be used as a table topper. I Know! exciting right?  Pinching myself…

If you have any questions on making Topiary feel free to contact me.

Oh, and have a Wonderful and Creative New Year!

Jude

Education

Quilt Sleeve Tutorial

Here is a tutorial I am offering at this year’s International Quilt Festival Open Studio.

Lake House Quilts Sleeve Tutorial

Lake House Quilts Sleeve Tutorial (1)

Lake House Quilts Sleeve Tutorial (2)

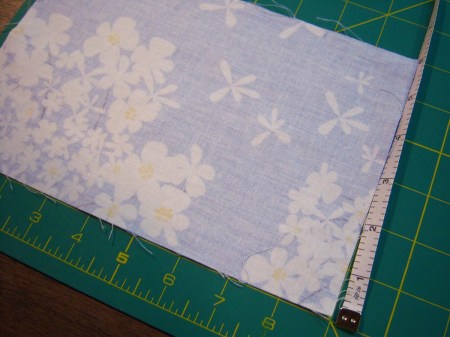
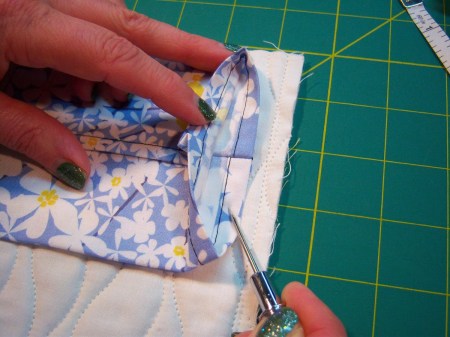
Measure quilt back from edge to edge in the direction where the sleeve will hang. This will be your length. (top) The width will be 9 inches. (bottom)

Lake House Quilts Sleeve Tutorial (5)

Lake House Quilts Sleeve Tutorial (4)

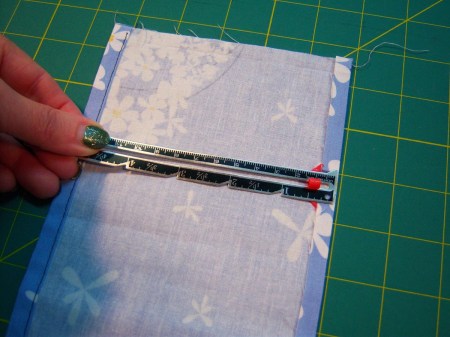
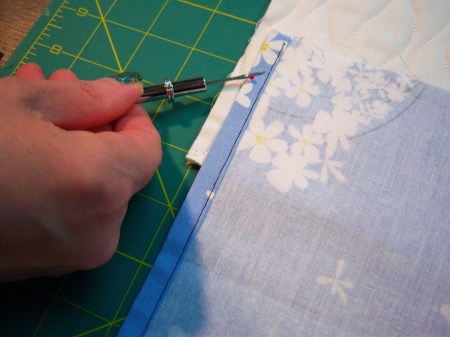
Place your sleeve right side down. Fold your nine inch edge a ¼ inch in on each side. PRESS. (top) Fold another ¼ of an inch on each side. PRESS. Then machine stitch close to inner edge. (bottom)

Lake House Quilts Sleeve Tutorial (6)

Lake House Quilts Sleeve Tutorial (9)

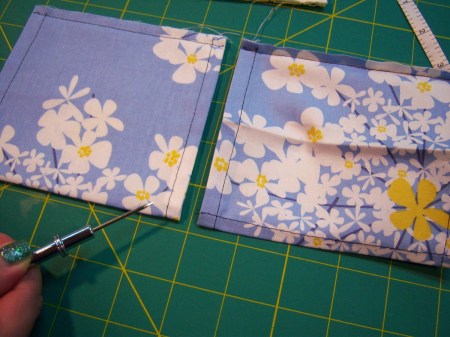
Bring the bottom edge up to meet (raw edges) wrong side together. (top) With wrong sides together, sew a ¼ inch seam the length of the sleeve. Begin the seam about ½ inch from the end, backstitch, continue seam to the end, then backstitch. This prevents the tail of the thread from hanging out the end of the sleeve. Press to form a new crease at the folded edge. Baste a large stitch ¼ inch along the new folded edge. (bottom)

Lake House Quilts Sleeve Tutorial (10)

Lake House Quilts Sleeve Tutorial (11)

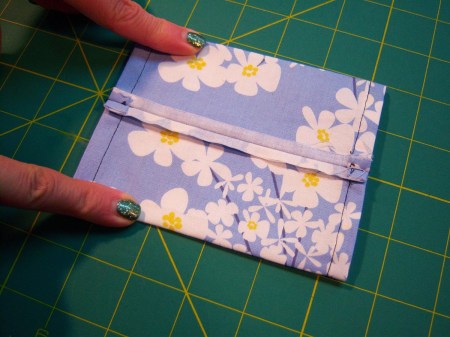
Place your hands into the sleeve rotate sleeve to position basted edge on the bottom and the stitched seam on top. (top) Position the two seams over each other. Gently press your top seam open. Press entire sleeve forming two new creased folds. (bottom)

Lake House Quilts Sleeve Tutorial (12)

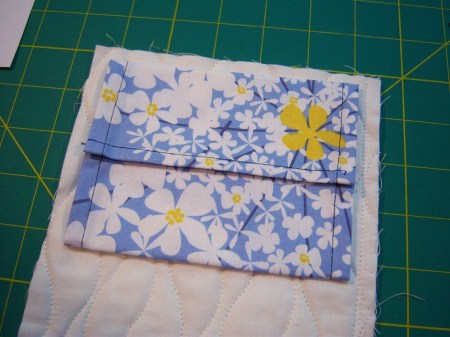
Take sleeve with opened seam side down against quilt backing. Center along quilt back, pin sleeve along pressed edges to the quilt back. The top of the sleeve should be about ½ inch from the top of the quilt.

Hands sew top of sleeve, being careful not to stitch through to the front of the quilt. Then hand sew bottom sleeve again being careful not to stitch through to the front of the quilt.

Lake House Quilts Sleeve Tutorial (13)

Hands sew bottom edge of the sleeve sides to the back of the quilt. I recommended that you double stitch or tack the corners.

Lake House Quilts Sleeve Tutorial (14)

Remove the basting stitch to give the sleeve the needed “D” shape for proper hanging.

 

Education

Finding The Right Design

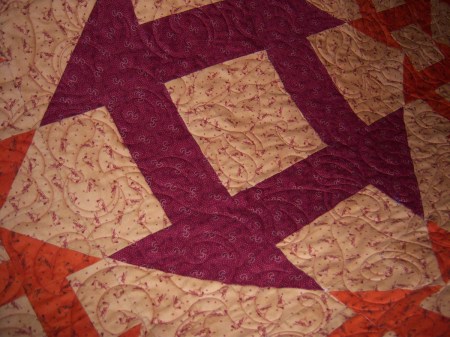
Have you ever had a task that you found to have a brain block on?  Maybe mine was temporarily away or just taking a break. My customer and quilt friend, Janice H. had brought me her quilt top to enhance with longarming the right design. She really liked her fabric with the crows and liked the folk feel, this top was giving her.

100_2300

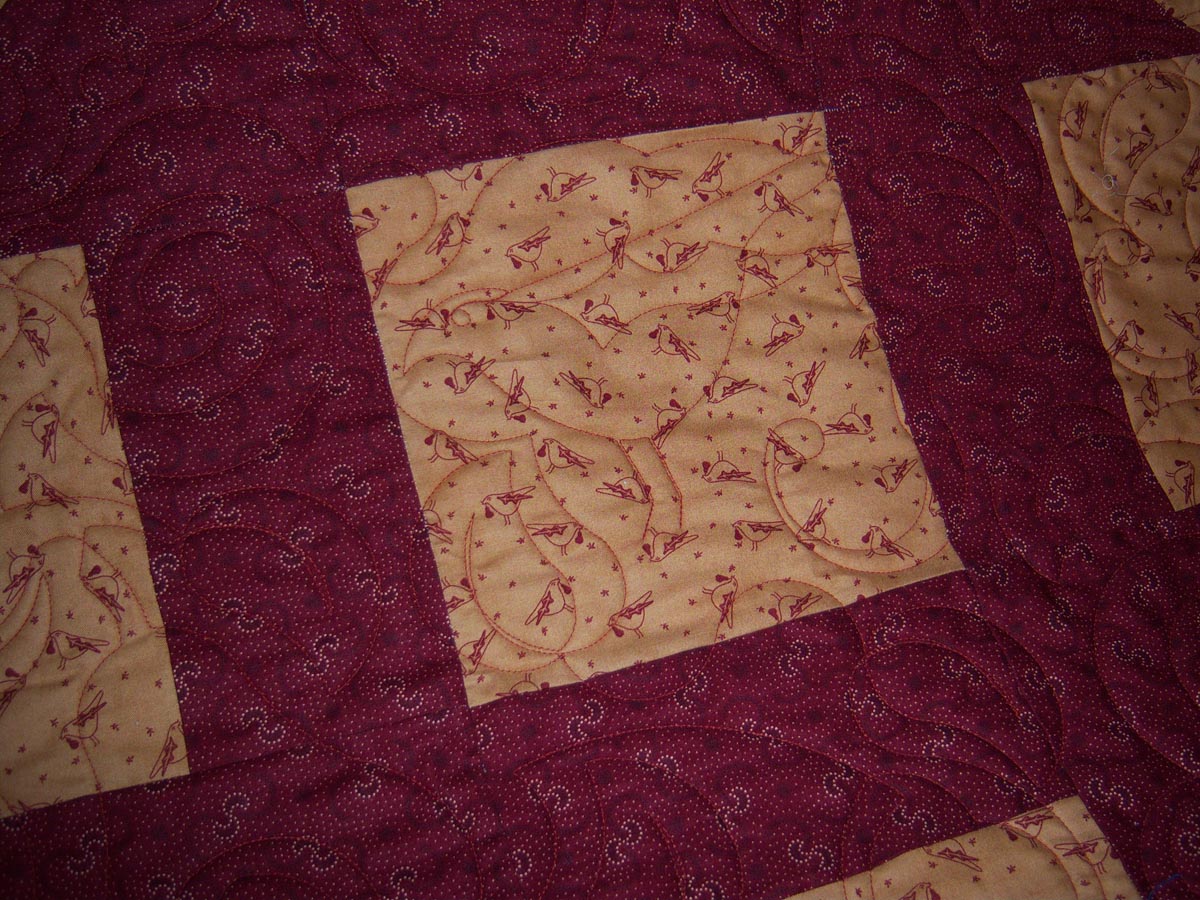
I looked at many digital designs; okay hundreds.  Auditioned various designs including a leaf design, but didn’t want to make the finished quilt too seasonal. Found a design by Debra Geissler and Designs by Deb, that had a great design with a pear but adding a bird would be better for this quilt.

100_2343

Okay, so if we could just add a crow……hmmmmm. I contacted Deb , sent her a close up of what I was hoping to achieve and 2 days later, DONE.

100_2345

Deb was open, fast and right on the money with the design.

100_2361

Happy Quilter = Happy Customer!!!!

I must say, this is the second time I have asked for a tweak, or something special from Deb and she has been a pleasure to work with.

100_2363

100_2362a


Education

Open Studio TAP At IQF

open studio 2014 TAP

During Open Studio, the audience was amazed with the options Lesley Riley’s Transfer Artist Paper (TAP) gives them. So often it is hard to come up with a label for your quilt, let alone write on one. This paper offers you a wide range of alternatives to add to your already finished work.

picasso16

My recent quilt that was in the IQF show had a label which I used this product on. Make a ho-hum label into eye-catching.